
Welcome to my little bouldering diary where I share and explain my favourite boulders I sent!
28th June 2026
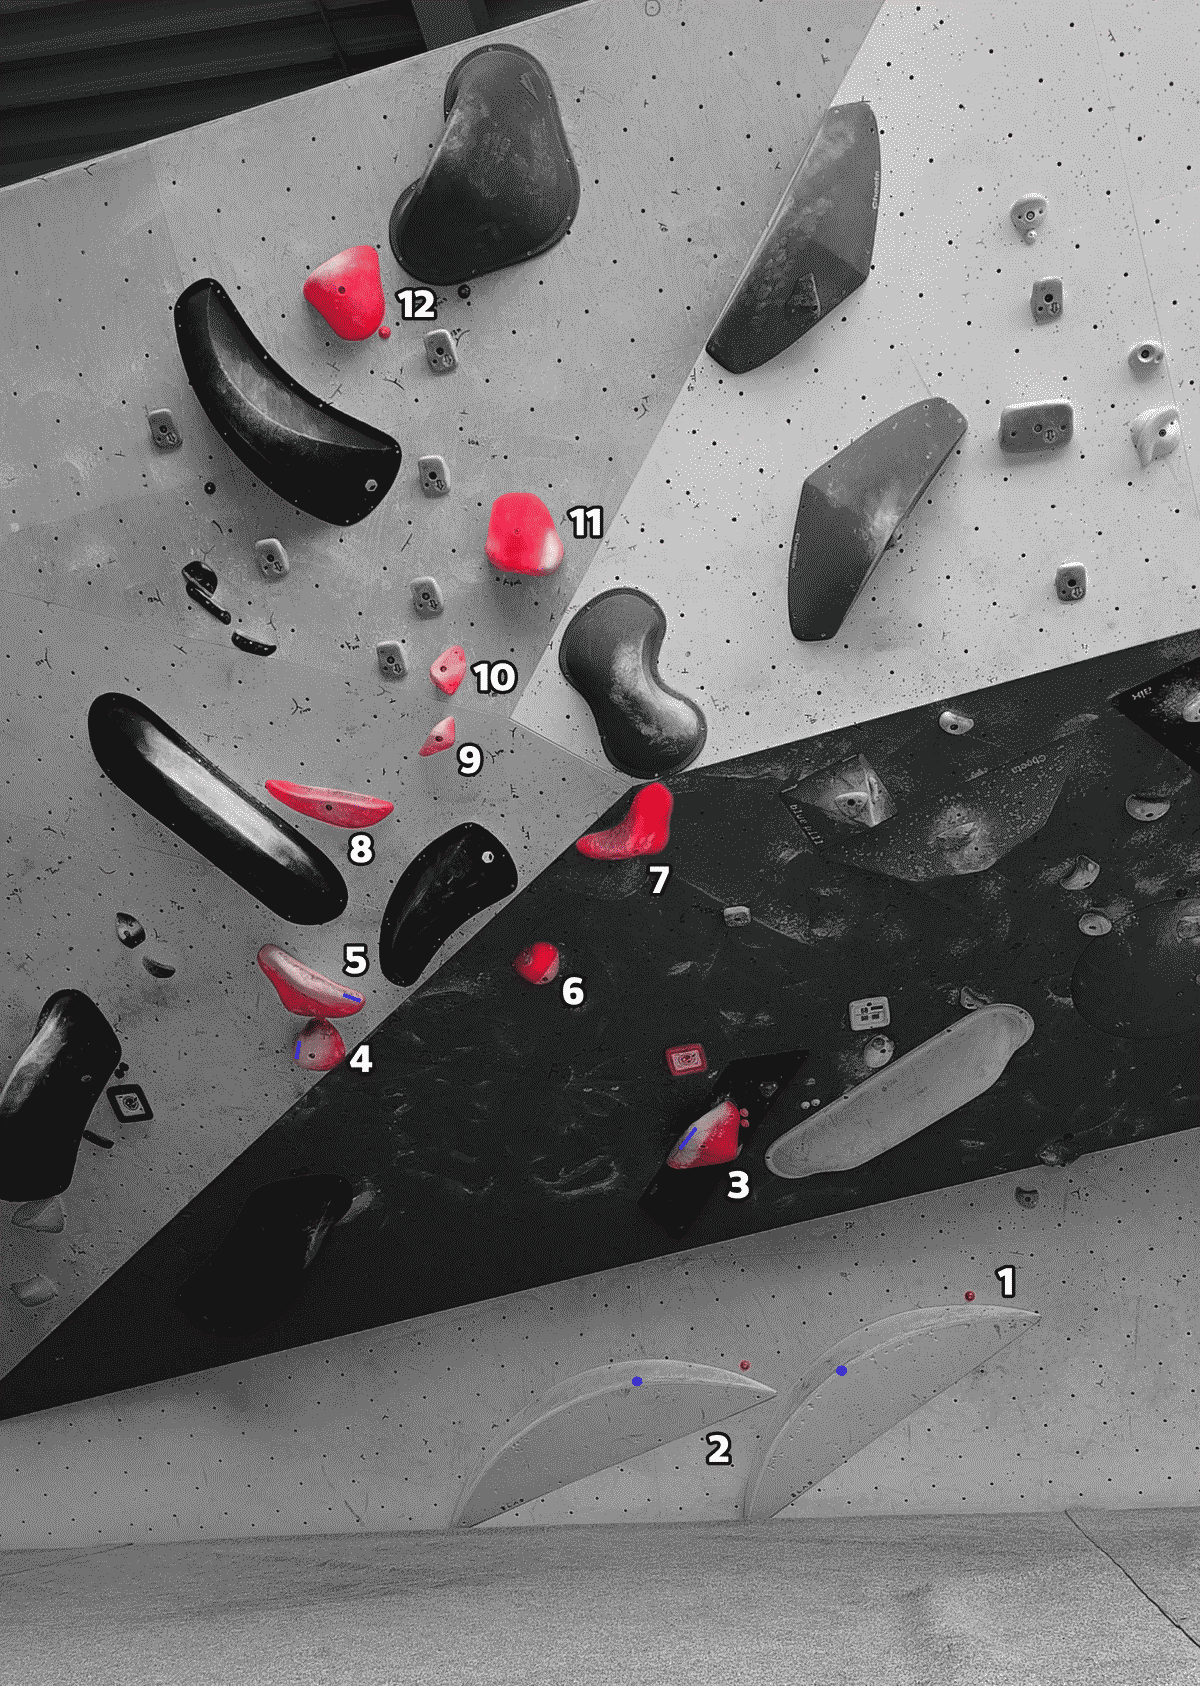
Start:
Both hands on 3 ideally in the purple marked place, because its a tad bit better in that place.
Right foot on 1 and left foot on 2 somewhere around those marked spots again as I found that to be the most comfortable for the dyno afterwards.
Move 1 (dyno):
First generate momentum with your hips swinging left to right. Then time your jump right as you reach the apex of the swing to the left.
Key thing for the dyno is to jump higher than you think. I saw some people almost jump off the crashmats so jump high. Also keep your legs tucked in otherwise you will dab the floor.
Then you need to catch holds 4 and 5 in specific places, especially 5 otherwise you will just fly off.
As you catch the holds your body has a lot of momentum and your right hand on 5 might slide up the hold as you try to stop.
If you caught it in the right spots its a huge jug.
Then you need to prepare for impact.
As you are swinging back you need to hit 3 with the arch of your right foot and immediatelly as you make contact curl your foot into like a claw shape and create as much tension as possible to stick it.
You're trying to hit the same part of the hold you were jumping off because its the most incut.
Move 2:
You match both hands on 5. You are also flagging/smearing your left foot under you.
Move 3:
Right hand goes up to 8.
8 is a pretty small crimp its about 15mm and at first it feels bad but when you match it its alright.
Move 4:
Match hands on 8
Move 5:
Right hand goes to 9.
Move 6:
Now you start to move your flagging leg and try to put it on 4
As you do that your right foot on 3 starts to get worse and starts losing tension.
Going slower is key, because the position is really finicky and if you do it wrong you will just barndoor off.
Move 7:
Move your left hand to 10 and try to keep tension with your left foot on 4
On my send go I didn't manage to do that and cut lose. So then I needed to get my feet up to 5
Move 8:
Swap feet on 4 and left foot on 5
Move 9:
Right foot on 7.
Move 10:
Take 11 with your right and stand up into it, because that will create enough tension for you right foot to properly stick to 7. Both the hand and foot are bad initially but the higher up you get the better they get.
Your left foot will be in the air while you stand up into the undercling so just flag it underneath you.
Move 11:
Put you left foot on 8.
Move 12:
Now just happily jump for 12 because its a gigantic jug.
As you can probably see I didn't even use 6, because I have no idea what that is for lmfao.
20th May 2026
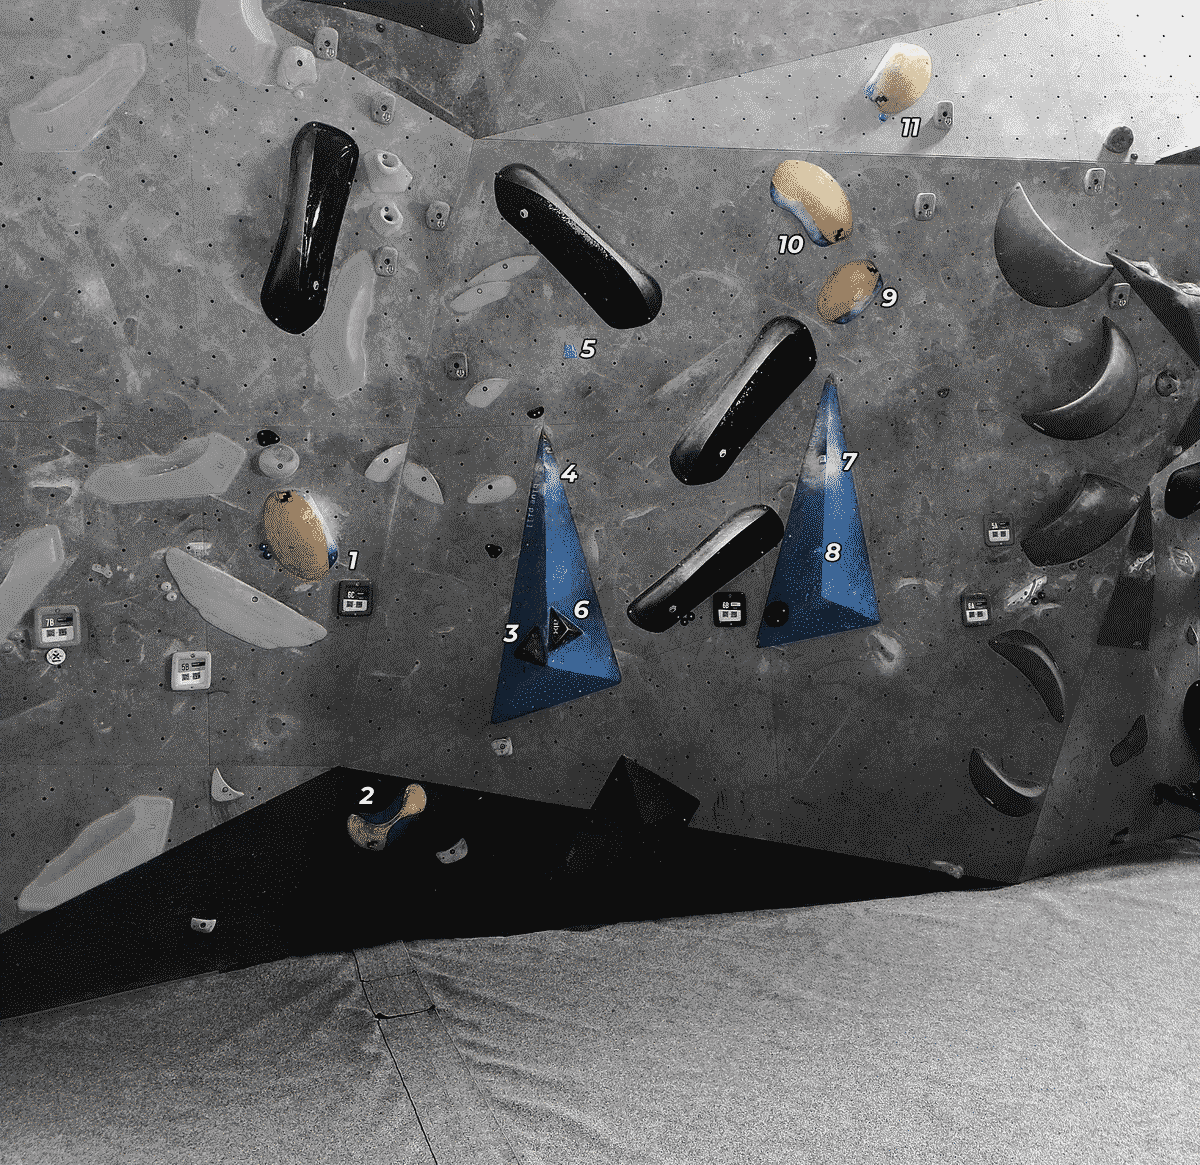
Start:
Both hands on 1 and left foot on 2
Move 1:
Pull on 1 and generate some momentum, put your right foot on 3 and take 4 with your right hand, but still pushing with your left hand on 1
Move 2:
Start pulling harder on 4 and match your legs on 3
The 4 crimp is pretty small about 10mm so it requires quite a bit of finger strenght to pull a significant amount of your body weight on just that small edge.
Move 3:
Put your right foot on 6, start leaning towards the right and take 5 with your left hand.
This is the start of the crux. I put my foot on 6 normally, but I have seen beta where you put your heel on aswell and your foot sloping down in the direction you want to lean, but that didn't work for me.
Most important bit is that you take 5 as a crimp not just with your thumb as I was doing in my initial attemps. If you take it with you thumb and standup tall it will become impossible to lean towards 7, because your hand will look like a chicken wing and you leaning will result in loss of balance and trust me swapping the hand around while in that position is suicidal.
Move 4:
Slowly lean towards 7 and press against it with the palm of your hand.
You might think that you need to press hard to keep your feet on, but because you are putting your bodyweight into the press the feet are actually quite stable.
Move 5:
Then you match feet on 6 stabilize and then put you right foot on 8, left foot is smearing after you step up to take 9 to keep balance.
The foothold is really small, but also very sharp and not slopey at all so if you place you foot right you can just put all the force in the world into it.
Move 6:
Now you put your left hand on 7 aswell, then you reach for 9 with your right hand.
Move 7:
You put your left foot on 7 and take 10 with your left hand.
On this move you need to be careful and quite quick, because as soon as you start putting your foot up you start to barn door off, so you need to take 10 very quick and be ready to pull hard to stop the barn door.
Move 8:
You take 11 right hand first then smear with your right leg (or try to use a bold hole), keep balance and match the top hold.
and thats it... no more boulders :(